Easy Ice Cream Bar Setup for Parties
An ice cream bar is a perfect choice for party dessert, especially if its a summer party or you if you are hosting a ice cream party. In this post I am sharing step by step all things you need to make it along with sundae bar ideas and other ice cream display ideas like a popsicle station and DIY ice cream bar. I am sure you will find some fun and functional ice cream bar party ideas.
This post contains affiliate links, which means I may receive a small commission, at no cost to you, if you make a purchase through a link.
Decide Your Ice Cream Bar Style
The first thing to narrow down when planning to setup an ice cream bar is what you are serving and the crowd size. Not only is this going to help in making a pretty ice cream bar, but also make sure all essentials are available. You can set up the cutest ice cream station, but if it does not serve the size of crowd, it’s gonna be a flop. So figure that out; I suggest keeping the occasion, guests age and size in mind when deciding.
Here are a few styles to try:
Classic Sundae Bar
This is the most popular and crowd-pleasing setup. Guests can scoop ice cream and top it to their liking. Everyone build their own sundae, kind of DIY ice cream bar. It works for any occasion, be it a backyard birthday, a casual get-together, or even a graduation party. Its simple, fun, and always a hit.
DIY Ice Cream Cone Station
Instead of bowls, you serve in cones. Along with ice cream and toppings, you also keep waffle cones and sugar cones, and let guests scoop their own. This one is especially great for kids’ birthday parties, they just love having ice creams in cone and also great for outdoor summer parties.
Ice Cream Charcuterie Board
This is a simple take on a charcuterie board, but more fun and styled and look stunning on a table and photographs beautifully. You arrange scoops in individual cups, surround them with toppings in small bowls, and style it like a charcuterie spread. This perfect for small size party and look aesthetically pleasing at events like a bridal shower, a Galentine’s party, or any occasion where the table needs to look polished.
Ice Cream Buffet
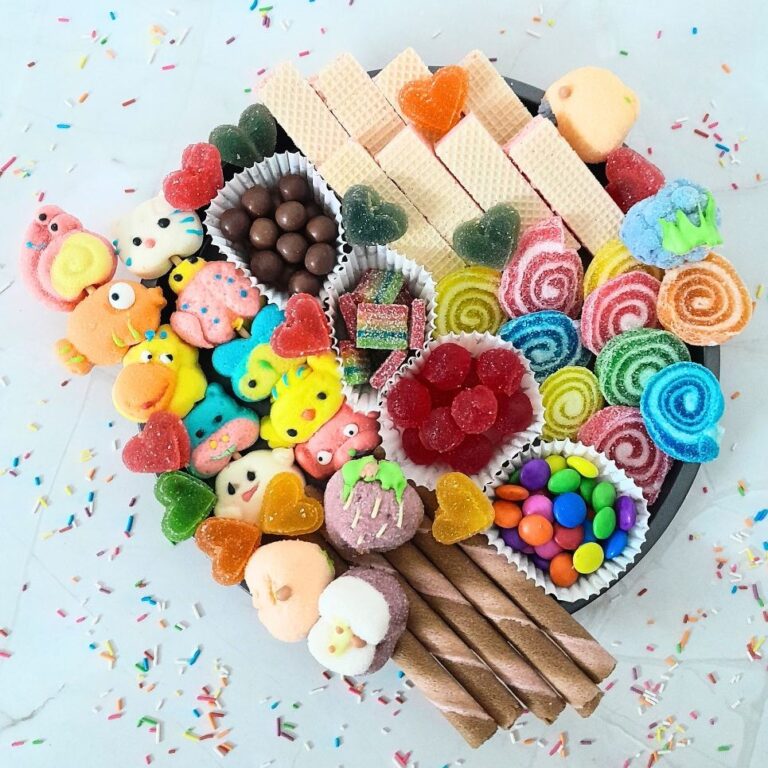
This is a full ice cream land with everything from sundaes to cones. You multiple flavors, many topping. You can even serve popsicles for a variation on the side. This is like a real dessert experience perfect for large gathering where you want to offer variety for all age and taste. Its great for big parties or milestone birthday celebrations.
Once you have a decided what you want to serve and how, everything else becomes much easier to plan.
Plan Your Ice Cream Bar Setup Space
The next step is figuring out where and how you are going to set it all up. The space you work with will shape how you arrange everything, so it is worth thinking about before you start pulling things out. Here are a few suggestions:
A folding table or dining table is the most common setup and works well for most party sizes. If you have enough room, place it against a wall so guests approach from one side and move through the station in a clear flow.
A kitchen counter or island works beautifully for smaller indoor gatherings. It feels natural, keeps everything close to the freezer, and you do not need to worry about moving ice cream far. If you are hosting an intimate gathering, this is often the easiest option.
A bar cart is a great choice if you want the station to feel a little more special and styled. It is easy to move around, works indoors and outdoors, and good choice if you are already using other tables for serving and have no more choice. You can place ice cream and toppings on top and supplies on the lower shelf.
For outdoor parties, look for a shaded spot first and build your setup around that. A picnic table, a folding table under a canopy, or even a sturdy garden table all work. Just make sure the surface is stable. If you are planning outdoor parties you must check out these 16 outdoor party ideas
Set Up the Ice Cream Base
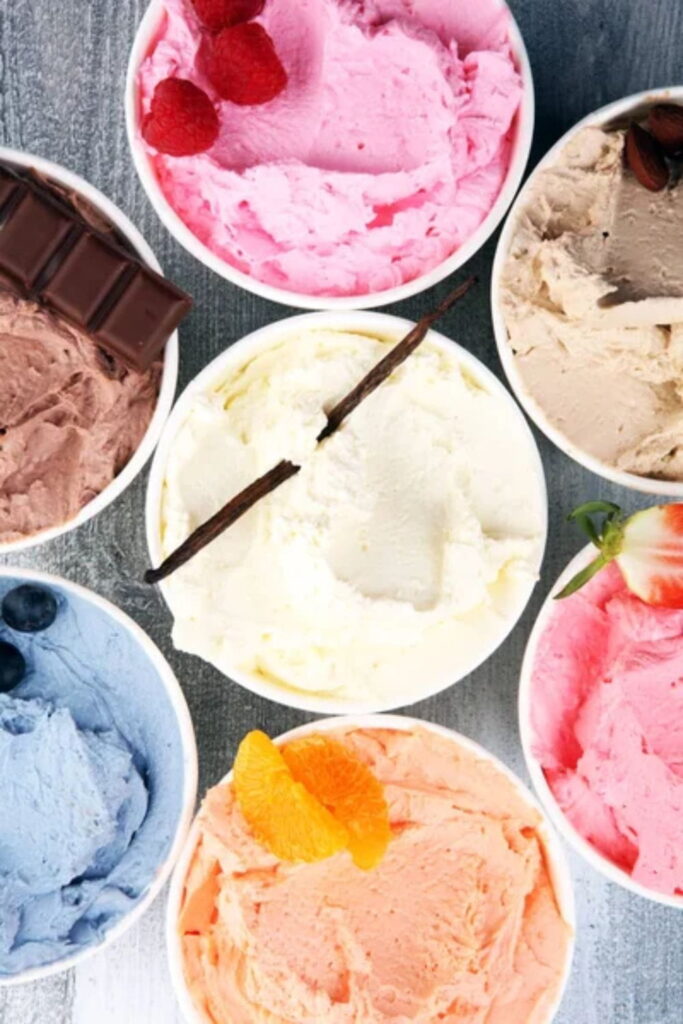
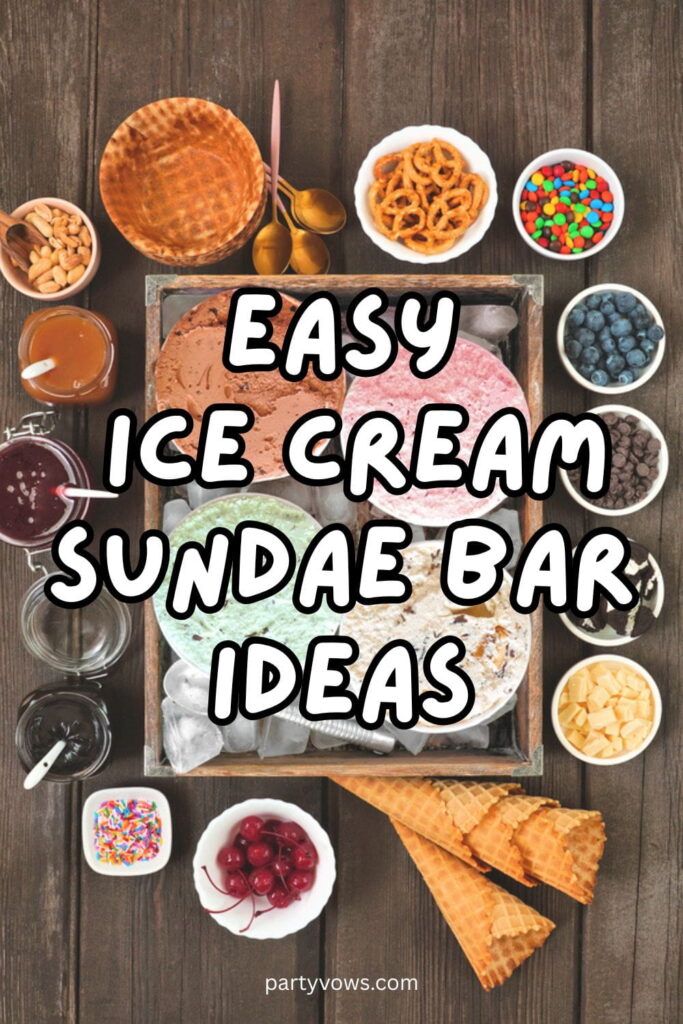
The star of the setup is ice cream; it is gonna be more in volume and need more space so its better to keep that as the focal point. Your arrangement should make it to look good, stay cold, and be easy for guests to access.
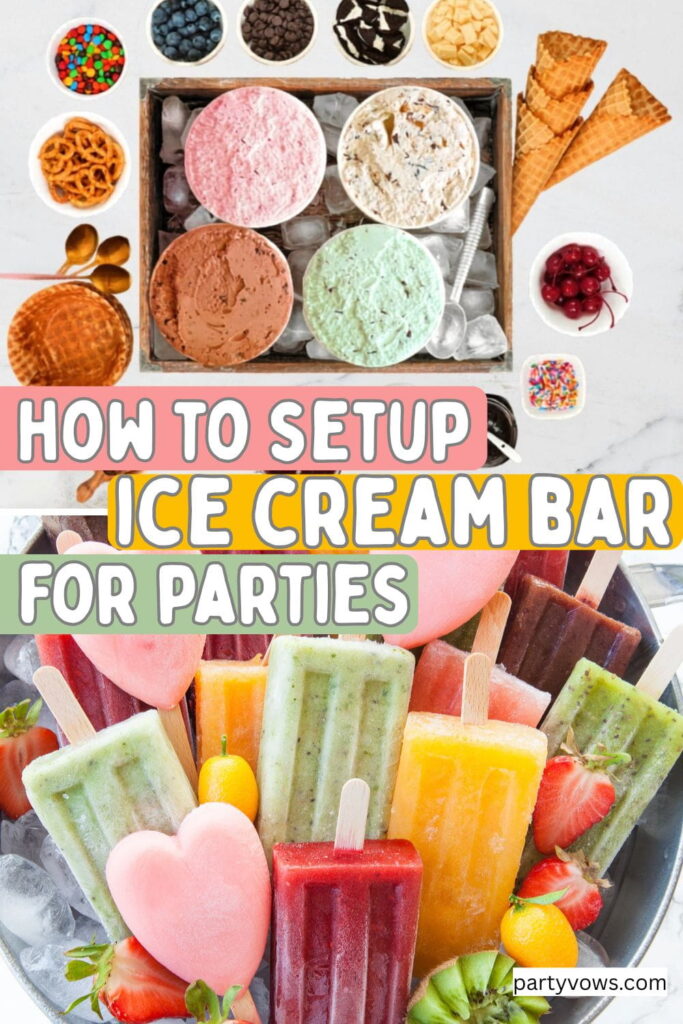
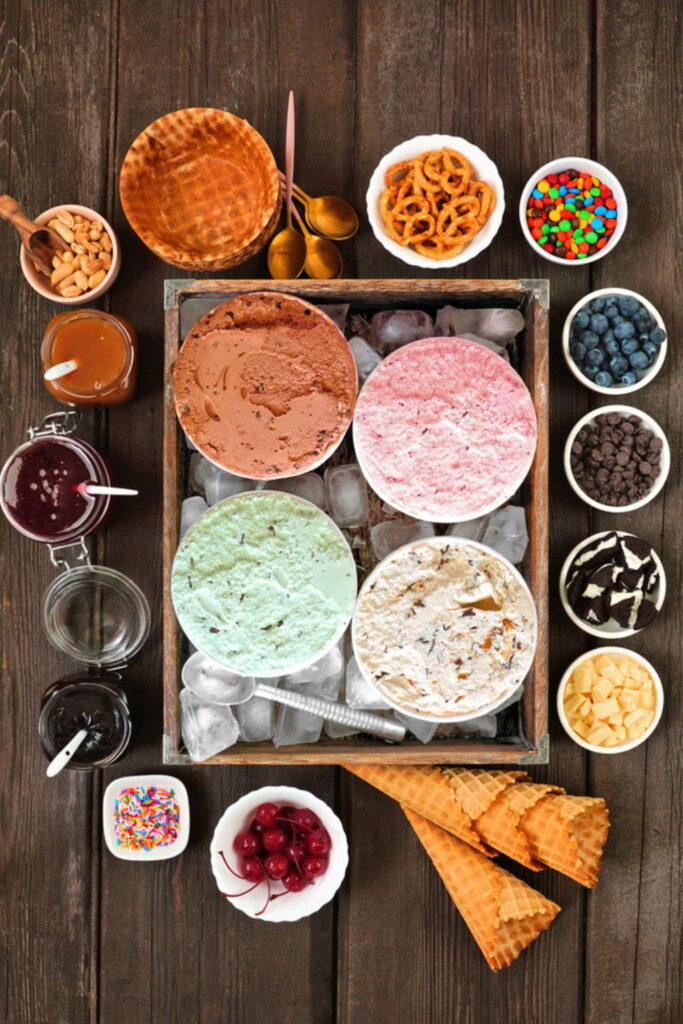
The best way I found is to display ice cream is to keep each flavor in separate tubs or containers nestled in a tray or tub filled with ice. This keeps everything cold without needing to run back and forth to the freezer, and it looks really intentional and styled. You can also use a wooden crate or galvanized tub for a rustic look.
For a smaller gathering, 2 to 3 flavors is plenty. For a larger party, go for 4 to 5. It is best to always have a few classic options like chocolate and vanilla (I prefer to have more quantity of classic options) and few fun or seasonal flavor like strawberry, mint chip, or a birthday cake flavor. This covers most preferred option, guests can make a variety and you need not make a big setup. As host, you need to manage space well.
If you are going for individual cups style serving instead of guests scooping from tubs, pre-scoop the ice cream into cups a few hours before the party and keep them in the freezer on a tray. When it is time to serve, just pull the tray out and set it up. You can use colorful disposable ice cream cups like these, they will add to the look of the station without needing extra decoration.
Place an ice cream scoop or two right at the station along with a small cup of warm water to rinse between scoops.
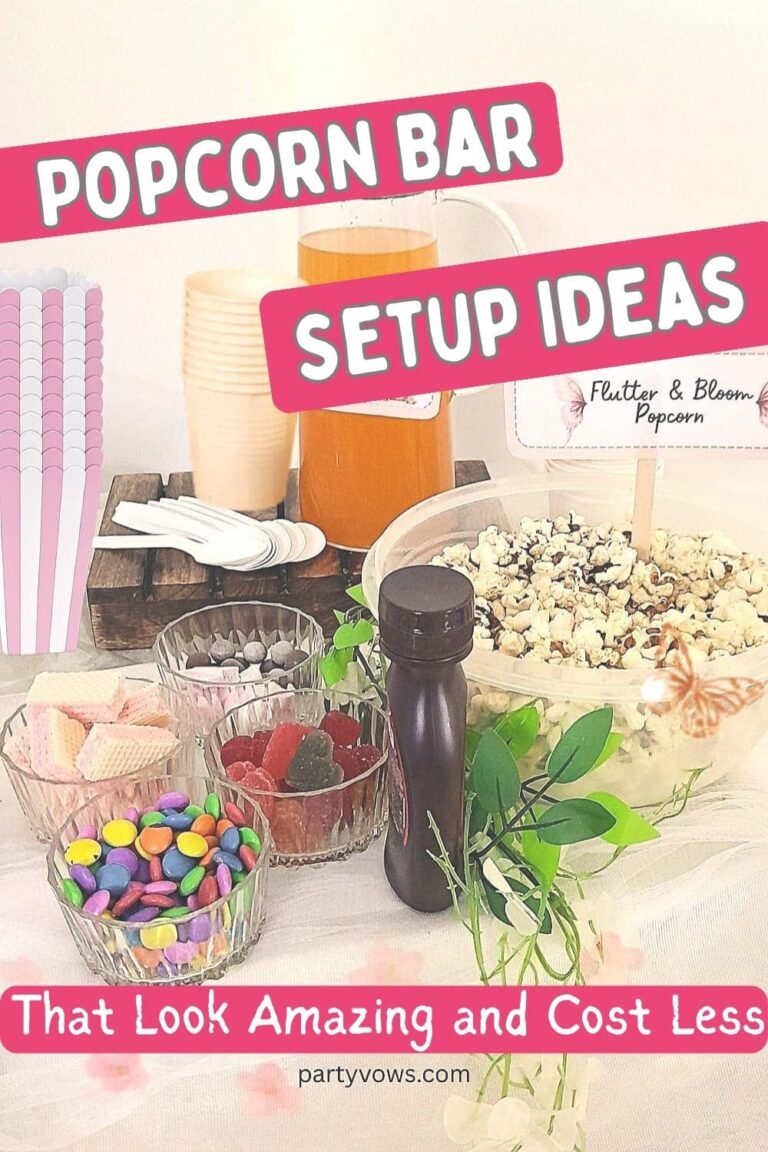
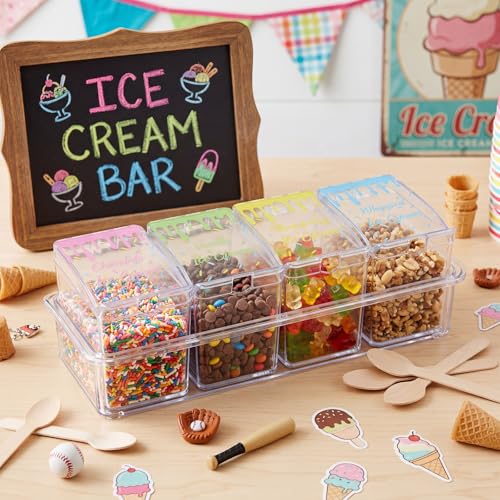
Add a Toppings Section That Looks Organized
This is the most fun part to set up, and it is also where a lot of people go wrong by just randomly placing bowls everywhere. An organized toppings section not only looks better, it actually makes the whole experience more enjoyable for guests.
I suggest grouping your toppings into categories and arranging them together like these:
Sauces: For this you can include hot fudge, caramel, strawberry sauce, and butterscotch. Keep these in small pour bottles or jars with spoons or squeeze bottles. Just label each one clearly.
Fruits: Fresh fruits like strawberries, blueberries, banana slices, and cherries go very well with ice cream. Arrange them in small bowls, placed together with other toppings.
Crunch: Crunchy toppings like crushed Oreos, granola, chopped nuts, mini pretzels, waffle cone pieces, and sprinkles. Add texture and flavor to your ice creams.
Fun Topping: If you are hosting kids party, you should have some fun toppings like mini M&Ms, rainbow sprinkles, gummy bears, marshmallows, wafer rolls and whipped cream.
For a really clean and styled look, I love using a sectioned topping container that keeps everything in one place without needing 10 different bowls scattered across the table. There are many serveware options available to choose from. Just get something you like and fits your aesthetics.
Set Up Cones, Cups & Other Essentials
Setting these things nicely on the ice cream bar ties the look together and is also important for the functionality. Here are a few essentials that you will need.
Cones: If you are offering cones, go for a classic sugar cone and a waffle cone. To display them neatly, stand the cones in a tall clear glass or a cone holder, separated into flavors. This will keep them upright and easy to grab.
Cups: If you plan to serve ice cream sundaes in cups. There are many cute, disposable cups available. You can get them in pretty designs and stack the for easy reach. You can also pre-scoped ice creams in the cup and arrange them in tray. I love the idea of using edible cups, waffle cups. You can place a stack on cake stand or tiered tray to bring variety to you ice cream buffet. You can also lay waffle bowls in a shallow basket lined with a napkin.
Spoons and scope: Place a bunch of disposable ice cream spoons in a mason jar or a small cup right at the station. For a birthday or fun party, use colorful spoons that match your theme color. For an elegant event, go for gold or silver dessert spoons. Have at least 2 ice cream scoop in warm tub of water for make sure guests are not waiting.
Napkins: Have way more than you think you need. Ice cream is messy and guests will go through napkins quickly. Tuck a stack in a holder near the end of the station. You can use the basic white ones or colorful for a themed party.
Tray or liner: You can use small tray to keep the topping bowls, it will keep the space mess free also add a visual distinction among the toppings. Have one tray with just the spoon and napkins at the end of the table. This will also help a create a flow to follow on the table.
Other Ice Cream Serving Ideas
If you do not want to set up an ice cream sundae bar or want to take things next level, here are few ideas.
Popsicle Station
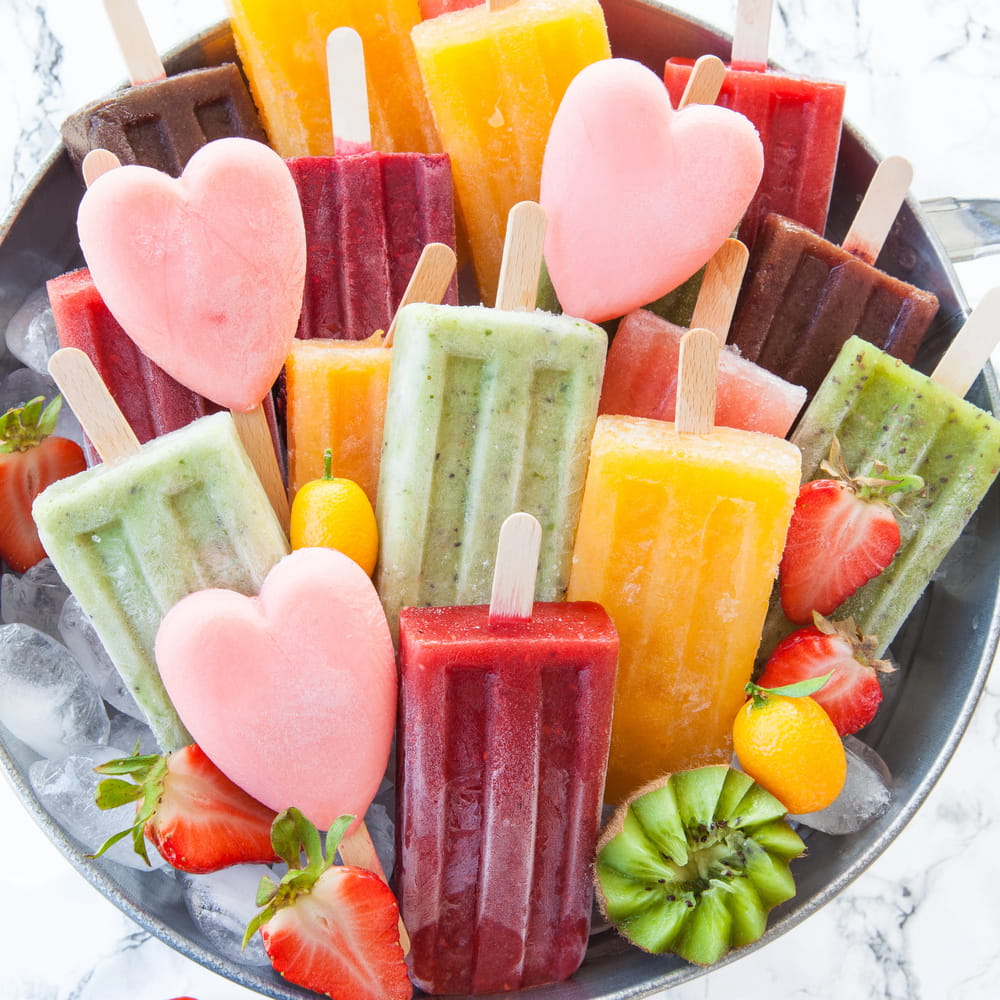
A popsicle station is a great option if you want to skip the typical ice cream bar. Especially during summer. And trust me it will not be boring, there are many fun ways to make popsicle station colorful. Take trays or large plate and fill them with ice and lay the popsicle in them. It is low effort to set up and looks really fun with a colorful assortment of flavors. You can separate them by flavor or mix and a colorful look.
Add a few fruits like lime slices, or berries or even few leaves of fresh mint here and there and your popsicle station will look so fun. If you are serving fruit popsicles, especially the one in which the pieces of fruit can be seen through the popsicle, they themselves look so pretty on the table. Popsicle station is perfect for kids summer party, a pool party or a backyard BBQ. You must try these, this is honestly one of the easiest crowd-pleaser.
DIY Set Up
If you want a wow moment at your ice cream station, offer pre-dipped or upgraded cones. Dip the rim of waffle cones in melted chocolate and roll them in sprinkles, crushed nuts, or mini chocolate chips ahead of time and let them set. Display them in a tall glass or cone holder and guests will immediately want to try them. You can also make it a fun DIY set up with some molten chocolate in large bowl and plain cones. Guest can dip the cone rim and add some sprinklers. This will works really well for kids’ parties.
Make Your Ice Cream Bar Look Pretty
Finally once everything is set up, its time to give your ice cream bar a touch of décor to look more beautiful and put together. Here are few styling tips to try
- Use a plain table cloth to let the ice cream pop, pastel color or light color will be a good option.
- Separate the topping bowl group by adding variable height. You can use cake stand, blocks or simply an overturned tray.
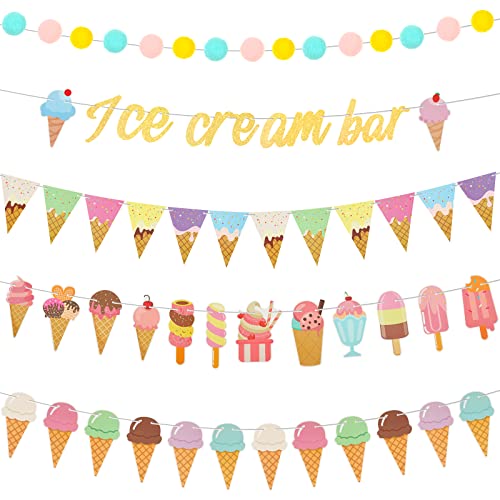
- A cute banner or “Ice Cream Bar” sign is all you need to anchor the station. Go for a chalkboard style for a rustic or casual vibe, or a printed sign in your party colors for a more themed look.
- For kids party use fun, and bright color serveware, add the party theme décor to the stand too. For elegant functions like bridal shower or anniversaries, use subtle colors and tuck a a fresh flower arrangement beside the station. Even small details like matching napkin colors to your party palette make the whole thing feel put together.
- A bowl of fresh strawberries or a handful of blueberries scattered around the station doubles as both decoration and a topping. It adds color, texture, and makes the table feel fresh and abundant without needing extra decor pieces.
Tips to Keep It Cold & Easy to Manage
Ice cream melts and managing that is the biggest practical challenge of setting up an ice cream bar. Here are a few things that genuinely help.
Keep ice cream in the freezer until the last moment
Set up your ice cream bar and keep space for the ice cream but do not put any ice cream out until serving time. You can transfer the ice cream in the containers you are going to use at the bar and then place I freezer. This way, you just need to place it on the ice cream stand at the right time.
Use an ice bath for the display
As mentioned earlier, nestle your ice cream tubs in a deep tray filled with ice. Add a handful of salt to the ice to it keeps things colder for longer. Refresh the ice every if the party runs long.
Pre-scoop and freeze for easier serving
For larger parties, pre scoop ice creams in a cup and keep to freeze before the party. Scooping slows things down and creates a queue. Pre-scooped cups pulled straight from the freezer keeps things moving and reduces mess.
Set up in a shaded spot for outdoor parties
Sounds obvious but it makes a real difference. Direct sun will melt everything within minutes. If you are setting up outside, find a shaded table or set up a small canopy over the station.
Keep a clean-up kit close by
A stack of extra napkins and a damp cloth tucked under the table is all you need. Ice cream drips are common and this will help you keeps your station looking neat throughout the party.
Refresh toppings as the party goes on
Toppings tend to look messy after the first round of guests goes through. Take a quick moment midway through to consolidate, refill, and tidy up the station. It takes two minutes and makes a big difference in how the setup looks for the rest of the party.
Hope these ideas helped you setup a fun and functional ice cream bar. If you are looking for more ideas on how to style a dessert or food station, check out How to Set Up the Perfect Party Food Table for tips on food flow, display ideas, and making any table look party-ready.
Related posts you may like
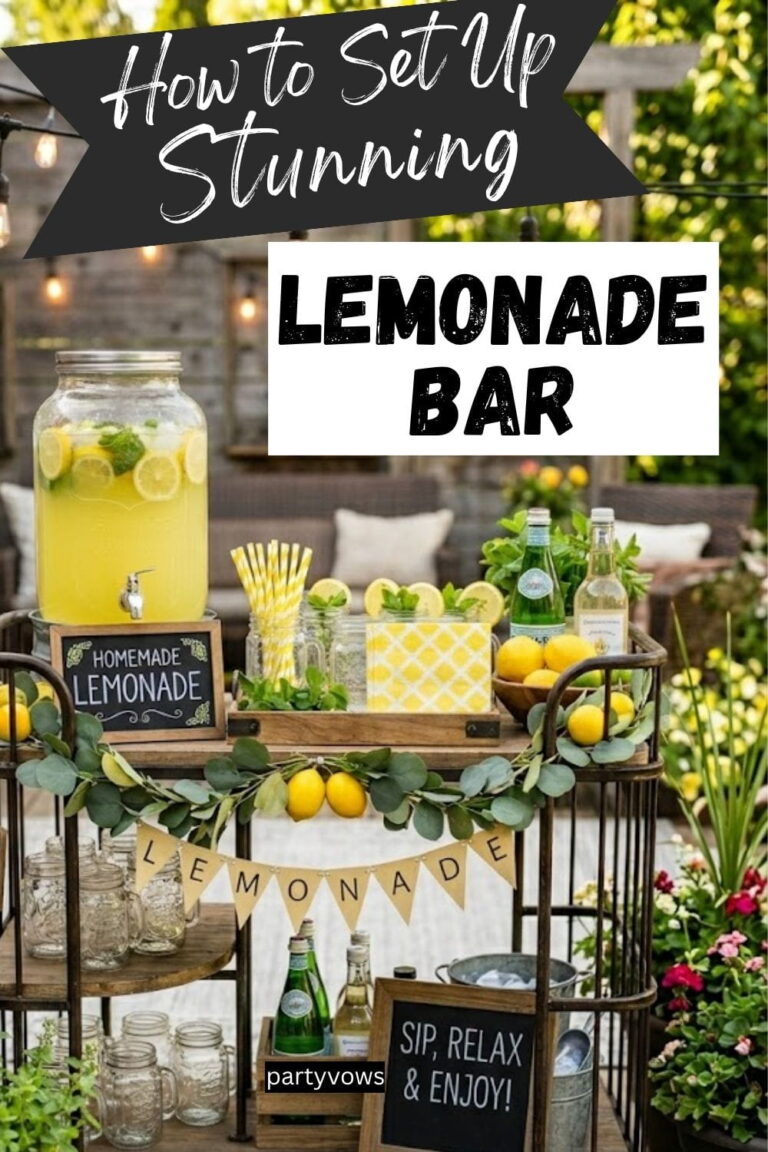
How to Set Up a Stunning Lemonade Bar